Wednesday, October 25, 2006

Tools for Eating Local

The impetus for this blog was to eat local as long as we can and to 
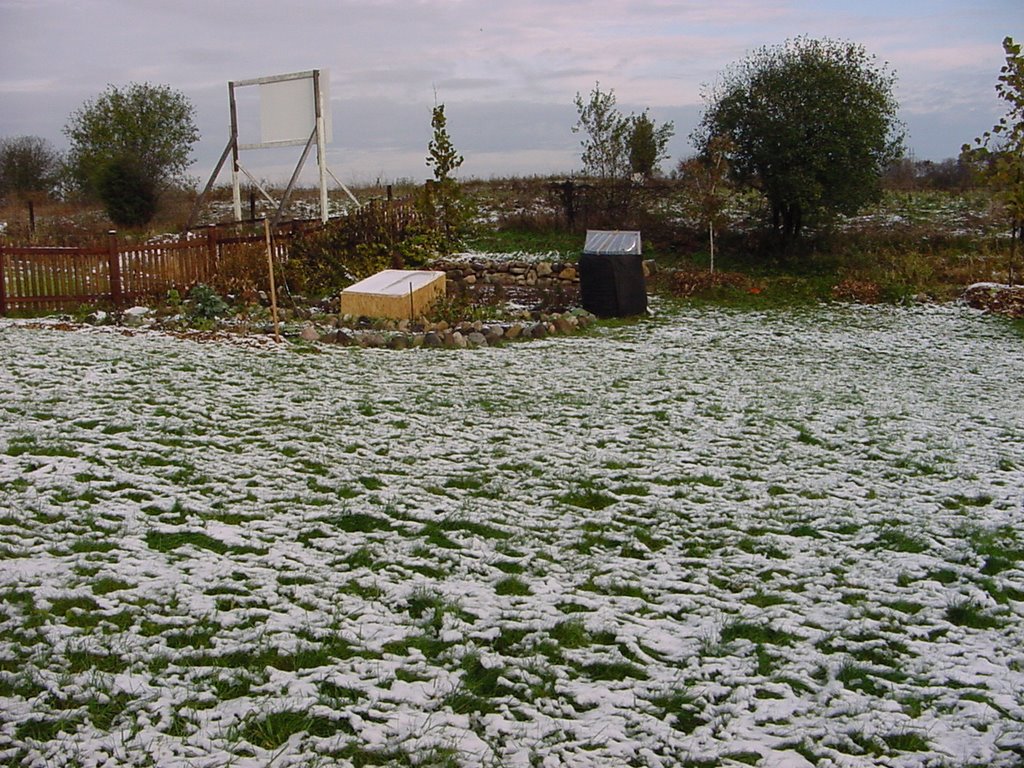
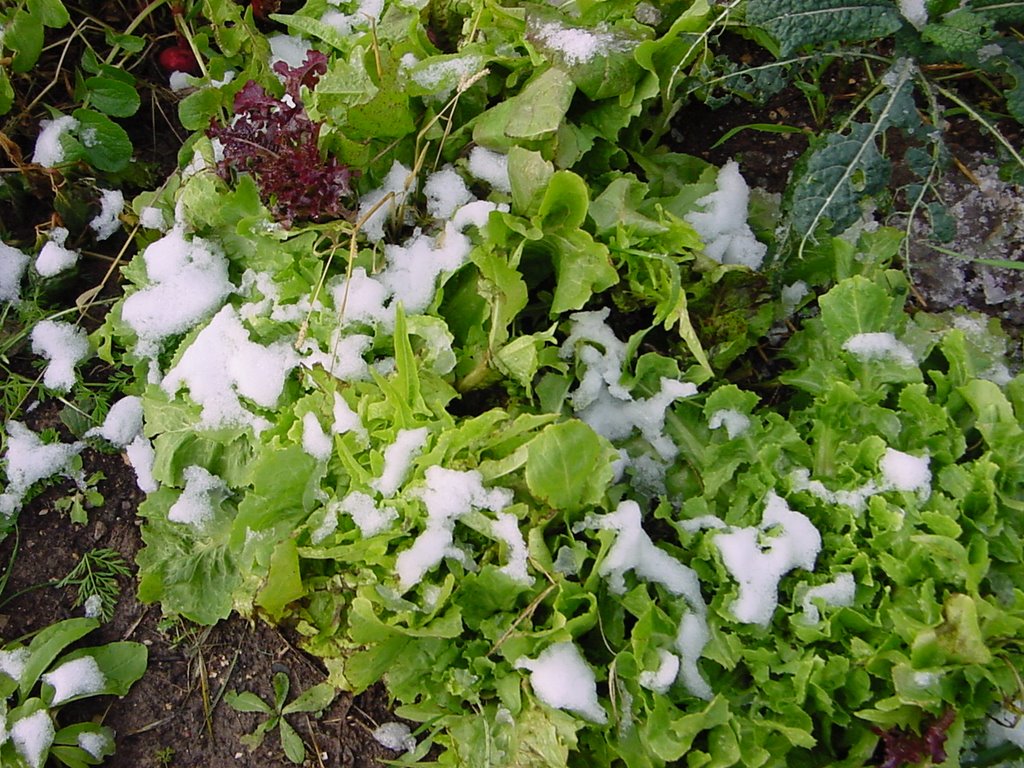
chronicle our journey. Due to the fact that we are still safely ensconced in Suburbia growing our own food is a distant dream (though I am doubling our edible gardens next year) we will need help.

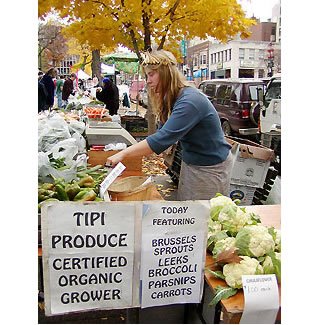
The biggest ally in our Quest for Local is the Madison, WI Farmers Market. The website is awesome, but can't really cover the feel of the Market on a bright August morning. Madison is flanked by 2 large lakes, so the air is crisp and clean, plus the University of Wisconsin: Madison is right down town and you are surrounded by the energy of youth and learning where ever you look. And then there is the beautiful State Capitol right in the middle of it all-with its classic archetecture, amazing rotunda, and organically maintained lawn planted from seeds from a Madison seed company.

The headquarters of Organic Valley is located less than 100 miles to the northwest-and the name is legit. OV is the biggest employer and has revitalized an entire region of the state. Their Coop trucks thread thru the countryside picking up loads of milk, eggs, meat, and veggies from the farmers and give them very good prices for them while ensuring a regional market, and covering marketing and distribution issues. This ensures that there are dozens of organic growers within a few hours drive of Madison and the market is all the better for it.

The market is BIG -averaging 20,000 visitors a Saturday. This is on par with some large city festivals, the only difference is it happens every single week! Recent estimates of revenue are in the neighborhood of $200,000 per week. Considering it is really only going for about 5-6 hours that is amazing. Big Box retail will pull in that number on a Saturday, but it will take them from 8am to 10 pm to do it, and I don't see hundreds of grinning toddlers eating organic fruit at the them!

Still more local is going straight to the farm. My biggest resource for this is www.localharvest.com . First and foremost it will pinpoint farmer's markets, coops, and most importantly direct to consumer farms for whatever zip code you give it. Once you get the map to the size you want it you can click on any farm/market and get contact info and descriptions. Uber cool. The listings are by no means all inclusive-but you can use the first contact to springboard you into the local organic underground. Buy some eggs for the localharvest.com chicken farmer-and then ask them if they know of anyone that sells vegetables or fruit. They will and your then you're in!

The other huge piece on the local harvest site is its listings of CSA's. 
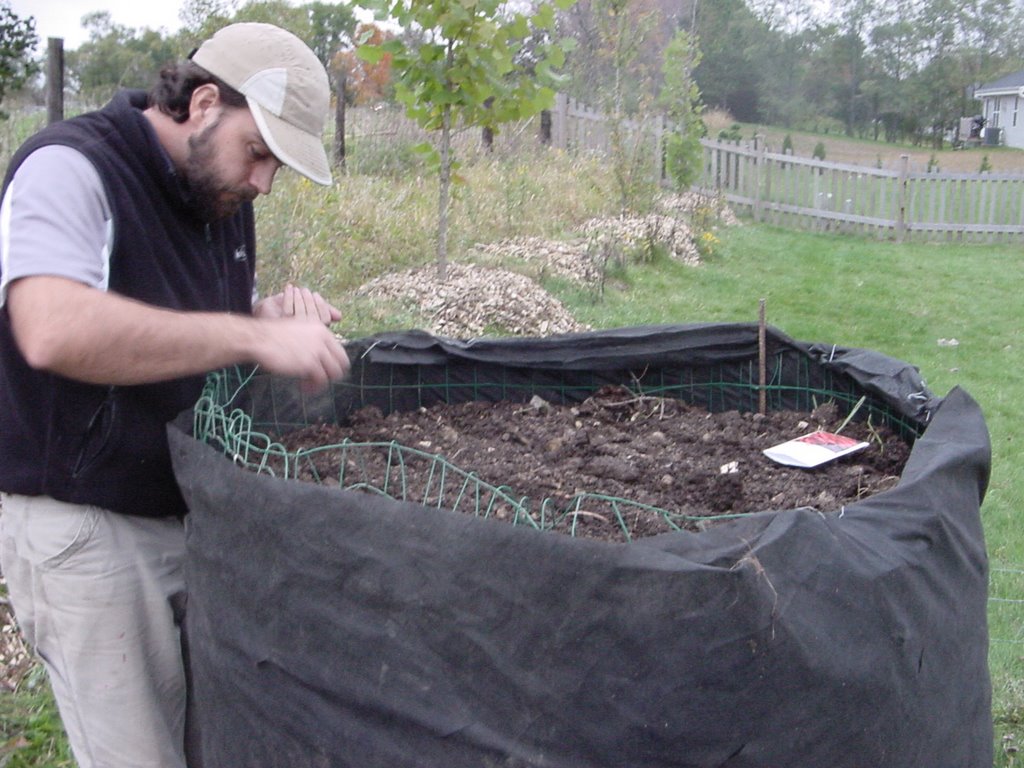
Community Supported Agriculture is to organic farming what GMO's are for Con Agra and can similarly revolutionize modern farming. Mia and I did a work share for Michael Field's CSA several summers ago and it was one of the pivotal moments of our lives. For the small sum of 5 hours 'work' (weeding, harvesting, and socializing) a week, we got a bushel of veggies and more organic gardening knowledge than you could fit in 10 books. Or we could have chosen to pay about $450 to pick up the veggies every week for a season. CSA's guarantee the farmer an income for growing veggies instead of Corn on Beans, encourage massive diversification of plantings (typically 6-12 varieties a week, every week, for 4 months), reconnect the consumer to the farm and make suburban farms viable. In Michael Pollan's book The Omnivore's Dilemma he talks with an Iowa corn farmer who would prefer to grow veggies, but laments that the Coop only buys corn and beans-who would he sell to? New Generation Marketing Coops like Organic Valley, and CSA's-at least near town centers- can answer that question. HUGE fan!

Eating local is not always easy, but easy makes for some ugly societal realities. And personally I'd rather talk to a farmer face to face while I buy my eggs than to a voice on a drive thru speaker while waiting for my 'egg' muffin.

Bon Appetit!

Monday, October 23, 2006

October 23rd Update

As it turns out, eating local year round might not be a cake walk, but it's not all that difficult either. This week, eating local just meant braving the rain and 40 degree temperatures with two young children, to shop the farmer's market 30 miles away. The Madison Farmer's Market is really amazing. There are dozens of booths set up all around the capitol square, and they sell an abundance of things you can grow or make. I don't think I've ever been to the farmer's market this late in the season, and I was surprised at how much variety there was. Most booths still had much of what they'd had all year. There were even a few tomatoes here and there. I could have gotten twice as much as I did, but I selected just a few of the tempting goods. This weeks haul was sweet potatoes, spinach, eggplant, brussel sprouts, broccoli, red onions, creminimushrooms, beets, cilantro, and heirloom popcorn. All grown within a couple hours of my house, all but the popcorn grown organically. There was so much more to choose from. I spotted some breathtaking romanseco, but I honestly think it's so beautiful that I'd have trouble eating it. I also picked up some beautiful harvest decorations. Mini-pumpkins, a spray of dried flowers, and a beautiful bunch of corn with a dried flower arangement tucked into the husks. The farmers had signs up reminding folks that the market will be moving indoors starting the second week of November. I'm very intrigued to see what will continue to be available as the temperatures drop. So far, it's an amazing abundance.

Sunday, October 22, 2006

The Willits Harvest Festival and 100 Mile Dinner

It was an amazing day. So many of the community came out for it. The Willits Economic LocaLization (WELL) group did a very wise thing to link up with the The Grange. The Grange is a Rural family fraternity founded in 1867, the nation's oldest general farm organization. From linking up with them, we "counterculture" sorts, as if believing that we have to be in better relationship with the planet and how we grow our food and where we get our energy is "counter to the culture", have this pool of amazing elders, some centurians, that participate in our events, share their wisdom and tell their stories of what it was like here back in their youth.

The event was held at our local Grange. There was a lot to see and do. There was a solar oven cookoff. This was my favorite solar oven. I got all sorts of written material that is still in my bag, but I am going to build a solar oven. They are so very simple! You can sterilize canning jars in them, cook stews and casseroles and soups, roast things, etc, all with the power of reflective material, glass and the sun.


This is Dave, the owner of Sanhedrin Nursery. He specializes in fruit trees and is a wealth of information about what grows well here in our little part of the world. He's also a pruning master who gives a free fruit tree pruning workshop every year at pruning time. When I stopped to talk to him, he gave me many contacts of local permaculturists who are sharing seeds of food crops that are both native to here and acclimated over many generations to grow well in our climate. He also gave me a flyer about Mendocino Permaculture's 25th Annual Chestnut Gathering and Potluck in early November. The Zeni Ranch has 100 year old, dry-farmed chestnut trees that are a testament to the sustainability of tree crops. The community is invited to come pick our own chestnuts from freshly fallen nuts, have a potluck and attend a discussion on growing the best nuts and fruits for our local climate.

Dr. Jason Bradford is the founder of WELL. Here he is with his hand cranked juice press, pressing grapes and apples. They pressed fruit all day and the resulting juice was served in pitchers with our lovely dinner. Jason lives on a large ranch and actually grew wheat and milled it into flour. It was his wheat that I used in my main course dish. I didn't know that until yesterday.

Watching the demonstrations, which included the solar cooking, the juice pressing and food dehydration and an acorn workshop illustrated to me again, on a larger scale than I employ myself, how much work it takes to process food from its original state, or in the case of acorns, transform something that is inedible into something rather deliciously edible.


The Acorn Workshop: Donna D'Terra is our local Grandma Herbalist here in Willits. She lives on a 160 acre piece of land that she has had for over 20 years. Her land is studded with majestic white oaks. About 7 years ago, she learned from the local Indian elder women how to collect, process, prepare and give thanks for the mighty acorn.

Yesterday I had said how hard I thought it would be to be vegan if you could only eat locally. I hadn't taken wild food into account. The acorn is a rich source of both fat and protein. They store well and you can put the meal into anything. You can grind it into flour that can be used for baking, although best used mixed with other flours. Click on this link for acorn nutritional analysis, if you're interested.

I also learned that the native people here, the Pomos tended the oak forests by planting the acorns and tended the land here on a huge scale, creating a garden so large that it was beyond the comprehension scope of the white (un)settlers who came here 200 or so years ago. The Indian's whole world was a garden of theirs and the earth's co-creation. And the acorn was a large part of their sustanance.

There are three main types of oaks. Donna, Freddie and I are demonstrating each type with acorn caps and oak leaf branches. Donna was the tan oak. Freddie and I were the black and the white oaks, but I can't remember which one was whom.

The acorns are gathered in September and October, piled into baskets and dried out of strong light and away from moisture. Once they are dry, the meats are removed from the shells. Unlike the Native people who used mortar and pestles to crack and grind the acorns, we cracked them with hammers and zipped the meats up in a blender with water. The resulting mash is put in jars, filled 1/3 of the way with meal and then the rest of the way with water. This is stored in the refrigerator and the water is poured off every day and replaced with fresh. This process goes on for about a week and is how the tannins, which make the acorn inedible in its whole state, are leached off.

After about a week, the meal should taste just a little bitter and somewhat nutty. Then it is ready to eat. It can be cooked as a hot cereal, pretty much like any other hot cereal. It can be added to stews and soups. Donna said when you add it to things, it just disappears, but you get the nutritional benefits of it in whatever you add it to. You can also dry the resulting meal and grind it into acorn flour. This picture is of a group of us cracking already dried acorns.

Donna also generously fed us acorn pate, made with olive, onions and celery. She also brought a small jar of just plain, ready to eat acorn much. It was rather bland, and very edible. Tara and I both said, "I could eat this," and have a plan to go up to a friend's land and start collecting acorns today.


This is Anne Weller, one of the organizers of the event. She did a fantastic job visioning and coordinating this amazing dinner that we had. She also built the lovely altar and led a heartfelt blessing of our food before we sat down to eat.

My heart was full when this entire room of my community joined hands, circling the the room and the food tables to give gratitude for our amazing bounty that our own lands give us. Annie sang a song and then we broke into lines to serve ourselves from the food tables. I will try to recount all the things that were there, but I'm quite sure I'm forgetting things.

There were 4 soups: A butternut squash, a pumpkin, a vegan vegetable and a chicken vegetable. There were gallons and gallons of salad made with local cherry tomatoes, peppers and lettuces, dressed with a tomato, herb, olive oil dressing. Trays of local sliced tomatoes and basil, fresh breads from the local bakery (not local grains, however), locally and freshly churned butter for the bread graced the salad table.

For the main dishes there were casseroles of many types: tomato, corn zucchini pie, eggplant parmesan (both having been topped with local sharp goat cheese instead of the traditional parmesan), a potato chard casserole, chicken vegetable stew and several potato casseroles with melted cheese, some with ham too. There were these amazing winter squash croquettes that I think were my favorite thing on the table. There was corned beef, ham and 2 1/2 foot long zucchinis that were stuffed with meat and vegetables. I know there was more, but this is all I can recall. It was too crowded at serving time to take pictures of the food, so I encourage you to let your imagination run here. For dessert there were bowls of fresh raspberries and fresh whipped cream, apple crumbles and my pumpkin custard.

All in all, we fed close to 100 people and everyone had plenty to eat. I felt so well nourished by the entire day. It is good to see what is possible with a vision, some hard work and a community that shares the vision. For that I give great gratitudes.

Blessings on the harvest!

Year Round Harvest

We knew that trying to extend the season in Central Wisconsin would be challenging. We got our first real test last night-about 1/4" of snow. Actually last night wasn't even our biggest frost yet-5 days after we planted the cold frames we hit a 27 degree overnight low. That was a hard enough frost to drop the Amaranth, Sunchokes, and Zinnias, but luckily the exposed carrots, lettuce and kale we planted in late July are being troopers. It is very, very surreal to march back to the gardens after work thru 40 degree rain, pop the cover of the cold frame and inhale the 55 degree humid air. The Compost Hot House Garden is so far significantly outpacing the Cold Frame. The Cold Frame has sprouts up, but they are easily 50% behind the Compost Garden (pictured below)-and its only been 13 days since planting. The radishes are progressing nicely, though the short day factor is certainly slowing them down.

This October cold snap is atypical in recent history-in the past several years, snow before Thanksgiving has been rare. In fact that 27 degree frost was at the very earliest range in our First Frost Date calendar. Again, it appears that I will get a run for my money on our first attempt to extend our growing season! That being said, I am happy to say that 2 weeks in, my dream of picking fresh greens for Thanksgiving Dinner is looking feasible as air temps in the Compost Garden even at 5am have been consistently 10-20 degrees above ambient.

Fingers crossed!

Saturday, October 21, 2006

Eating Within 100 Miles

I'm making a couple of dishes for the Harvest Dinner going on in my town today. This is the all day event I mentioned last week or so. I decided to change my menu from butternut squash gratin to pumpkin custard.

Pumpkin custard, instead of pumpkin pie, because we don't grow grains here for the making of flour which would have made the crust. Of course there is no cinnamon, nutmeg, cloves or ginger in my custard either, because we don't grow those things in N. CA. I thought long and hard about spices, wondering what, if anything I could use. We have great abundance of savory herbs, but no sweet spices. Except one: Coriander. Coriander, the seeds that were my early summer cilantro. So I ground up 1tsp very fine in my herb grinder and added it to the custard. I also topped it with some of the blackberry syrup I made about a month ago.

Winter squash is a powerhouse of Vitamin A. Here is a nutritional chart from the The World's Healthiest Foods site.

The other thing I realized is that it would be very, very challenging to be a vegan if all your food came from within 100 miles: No beans, no nut butters, very little fat and the only source I can even think of besides walnuts for vegan fat is olive oil which is a baby industry here. It was very odd to make the custard, as I don't usually cook with whole eggs, whole milk, butter and honey. I'm an egg whites, soy milk, Earth Balance and agave grrl. I'm not vegan but I like eating and cooking with soy substitutes, as I pretty much don't eat dairy products.

The recipe:
I wedged up, deseeded and depulped a sugar baby pumpkin from my garden that was just slightly smaller than a kid's soccer ball. I boiled it until it was very tender, removed the wedges from the water, let them cool, then peeled them, put it all in the food processor and zipped it up until it was very smooth. I got 5 cups of pumpkin.
To the 5 cups of pumpkin, I added 7 local large eggs that were well beaten, 1 qt of local milk, a whole pound jar of local honey and the 1 tsp of finely ground coriander.
This was poured into a buttered 9"x13" baking dish and convection baked for just under an hour in a 350 degree oven. After the custard was completely cooled, I drizzled home made blackberry syrup over the top.
In the name of using all the pureed pumpkin, I had extra custard, so I threw together a crust, added cinnamon, cloves, ginger and nutmeg to the remaining custard and baked a small pie as well. This was just for us. I had a slice when it was still hot out of the oven. It was delicious. Making pumpkin pie with a fresh pumpkin instead of canned holds no comparison. Canned is easy and adequate, but now that it is pumpkin season in many parts of the country, I highly recommend buying a couple, preparing them as illustrated above and using the pureed fresh pumkin instead of canned for the things you might use the canned for like pie, soup, curry, etc.

So some illumination came in the doing of this task. I've downloaded a NI label I made from the Nutrition Data site. So as you can see, baking local was both nutritious as well as cholosterol and sugar heavy. But this is a dessert to be indulged in, to celebrate the incredible bounty of my area. So for this one time, I'm not going to worry about calories and Weight Watcher points!

Now I'm off to make the corn, zucchini, tomato pie. I was given a cup of local whole wheat flour and 1/4 cup of local olive oil for this dish. Both flour and oil were horrendously expensive which illustrates the dearth of availability of these products locally.

I will be back, probably tomorrow with pictures and my story of the whole experience.

Tuesday, October 17, 2006

Apple Butter

Maddy's Pear Post absolutely inspired me. When we got our crate of apples, I was ready to get creative with them. We've eaten a lot of apples in the past couple of weeks. I've made an apple pie, apple topping for syrup, and curried apple and roasted squash soup. As the weather got colder, I worried about our 30 odd pounds of apples that are still in the garage freezing, so I decided to try something new. I love apple butter, so I decided to go for that. Apple butter is great spread on bread, spooned onto pancakes, or stirred into steel cut oats. I looked a number of recipes and ended up going with one from the National Center for Home Food Preservation, a site I've used before. It has so much good information about canning, and recipes to go along with their clear instructions. Here is a link to the original recipe. I pretty much stuck to it, just halving it. We actually had three huge boxes of canning jars that I freecycled this year, before I warmed up to the idea of canning. Here is how I made our apple butter.

I started out with 4 pounds of Cortland apples. These apples are pretty large, and they're abour 3 to a pound. After washing thoroughly, I peeled and cored the apples, then chopped them into 1" pieces. Tip: Be sure to get all of the peel off, or you'll have problems down the road. I put the apple pieces in a large sauce pan with 1 cup of apple cider vinegar and 1 cup of cider, brought the mixture to a boil, and continued it at a gentle boil. The mixture should get nice and soft, and reduce by about half. This took about 20 to 25 minutes. The next step was the most trying, but would have been far easier with better equipment. Luckily, there's a low tech method for the occasional canner like me. To refine the mixture, I used a sieve and the pestle from our marble mortar and pestle. (At this point I had to keep picking out pieces of the peel that I had neglected to remove from the apples originally. I had planned to leave this as a chunky apple butter, which you can do, but I changed my mind!) The sieve-pestle method actually worked incredibly well, it just took some arm strength and patience since I had to do small batches. The next step was to add a generous cup of raw sugar and brown sugar, 1 tablespoon of cinnamon, and about 1/2 teaspoon allspice. Simmer this mixture until the apple butter thickens. It should mound nicely on a spoon or plate and not "leak" any vinegar. This only took about 10 minutes for my apple butter. Spoon the finished apple butter into sterlized jars, leaving 1/4 inch headspace, seal, and process in a boiling water canner for 5 minutes. Be sure to practice safe canning methods! I was very pleased with how the apple butter turned out. Now we'll have a comforting fresh apple taste from a local orchard all through the winter.

Sunday, October 15, 2006

The Vegetable-Industrial Complex

In my world view, the E. coli outbreak of a few weeks ago was another signpost along this rocky road of food centralization and mass production of what goes on our tables, that we are going the wrong way. It seems that in the name of "cheap" organics or choice to eat whatever, whenever, if you can only justify the cost in dollars at the cash register, we are getting way too far from our food source. Michael Pollan had some very interesting things to say about this in an article in today's New York Times titled The Vegtable-Industrial Complex

When I started gardening about 12 years ago, I quickly learned a few priceless things:

1) The food I grew drank the same water, breathed the same air, was nourished by the same sun and stood in/on the same ground as I did. And wouldn't how a vegetable transformed this same water, air, fire and earth magnificently nourish my body and be compatible with how my body transformed these same elements?

2) The love and care I put into these plants returned to me tenfold in how they nourished me back.

3) I can't get any fresher than walking outside and picking it right before I eat it.

4) The work of planning, planting, growing, loving and harvesting a garden is one of the ways I keep connection to the Earth and that is good for me.

And to this list, I can now add:

5) I know what goes into the ground to feed and water what I grow. And that has become important in these days of centralization, of the watering down of organic standards by the lobbiests of agra-business in Washington DC, of the cost of lives and misery of so many over the oil and gasoline that fuel the trucks that come from Goddess-know-where so I can have my watered-down USDA organic standard with its pretty label.

Someone who responded to a recent blog entry on The Accidental Hedonist said, in reference of the quoted article by Mark Morford that appeared last week in the San Francisco Chronicle, "I feel sorry for Mark Morford. He doesn't know the difference between evolution and death. The megaproducers have recognized the demand for more-natural products, and are putting not-as-organic but reasonably-priced products on the shelves. We now have an official definition of "organic," and though it isn't as comprehensive as purists would like, it's a good start. There's no reason individual producers can't follow stricter standards and by advertising that attract a more-demanding clientele.Those of us who can afford "true" organic food (whatever that is) can still get it. Here in the Northeast, it's easier than ever. And relying solely on barefooted hippies isn't going to feed 300 million Americans."

Well gentle writer, I don't think you know any small farmers. I know many and they usually wear some kind of foot covering...as if "barefoot hippies" were anathema to something good. When the end of centralization hits you square between the eyes, I hope you can tell the difference between evolution and death. That difference may be the small scale local organic farmer that offers CSA's to your community.

I see the mass production of food under a pretty label with an agra-giant behind it, sporting the USDA organic stamp to be the beginning of a disease that can likely end in death for what CA Certified and Oregon Tilthe had worked so painstakingly to create. But organics have become big business and I for one know that when "Big Business" gets its paws onto something beautiful and precious, not good things usually happen.

All this to say, I think what Mia and Beo are attempting, what I am attempting, what anyone who takes a piece of Earth to steward and dance with, to grow food, draw bees and birds and insects into, midwife the miracle of the cycle of life: seed, sprout, flower, fruit, seed, compost is healing the planet, their bodies and their own spirits. The Earth teaches me so many things that could be found in some form or other in books or by another's teachings, but there is great power and great magic in what I learn directly from my little piece of Earth, from those mysterious, tiny seeds, those tender sprouts, those fragrant, sexy flowers, those vulnerable baby fruits, that overwhelming harvest, the saving of seeds for next year, the midwifing of the dying and the composting of the summer garden, the living of and not just conceptualization of the cycles of life that no one else's analyzations or philosophies can really give me in nearly as complete a way.

And that's why all the hours and all the work is irrelevant to me in the pricelessness of learning to be more and more and more self sustaining, to be closer and closer to source. I learn. I grow. I change.

The spirit of the organic food movement cannot be killed. While the machine of big business co-opts the very standards of organic and turns it into something unrecognizable, it's spirit will rise again. It does rise again in local CSA's, in farmers who grow their crops biodynamically and bring them to local Farmer's Markets, and it rises in me, in Beo and Mia and everyone else who puts a seed in the ground with a hope and a prayer that it will grow. And we will dance with the cycles of life and teach this precious knowledge to our children, who will know where some of their food came from and by virtue of that learn about where all their food comes from.

And to me, that is evolution.

Saturday, October 14, 2006

The Willits News - All-day Harvest Festival on October 21

This is something that is going on in my little rural town next Saturday.
The Willits News - All-day Harvest Festival on October 21
I am volunteering two dishes for the 100 mile dinner.
What is really interesting to me is how very challenging it is to make a meal in which everything in it comes from within 100 miles. We will have a table with dishes; soups, salads, main dishes, vegetable side dishes and desserts that come from within 100 miles, sans an ingredient or two. In front of each dish will be little placards that name the things in them that do NOT come from within 100 miles, like salt, flour, breadcrumbs. Here are my dishes, with the not within 100 miles things bolded in the recipes:

Corn, Zucchini and Tomato Pie
(Posted by Caraflora on the Weight Watcher's Veggieboard, July 2004)
3 cups fresh or frozen and defrosted corn kernels
5 small zucchini, cut into matchstick pieces
2 tsp salt
1-3 T fresh dill weed
1 T olive oil
4 ripe tomatoes, cut into 1/2 inch slices
1/2 cup grated or shredded Parmesan cheese
1/4 cup dry breadcrumbs

Preheat the oven to 375 degrees. In a 13 x 9" ovenproof baking dish, combine the corn, zucchini, 1 tsp of salt, the dill and 1 T of olive oil, tossing to coat the vegetables. Cover the vegetables with the tomato slices. Sprinkle with remaining salt.

In a small bown, combine the cheese and bread crumbs. Sprinkle the mixture over the tomatoes and mist the top with olive oil, using a Misto. Bake the pie for 30 -50 minutes until the tomatoes are soft and starting to carmelize and cheese is bubbling.
Remove from the oven and let stand for 5 minutes before serving.

Provencal Butternut Squash Gratin
(adapted from The Mediterranean Vegan Kitchen, adapted to omit nutmeg and pepper which are not locally grown. The recipe has been doubled from how it was written in the book.)
2 butternut squashes (about 6 lbs), peeled, seeds and membranes removed, coarsely chopped
2 cups packed fresh parsley chopped (I will use 1 cup dried parsley)
6 large cloves of garlic finely chopped
1/2 cup all purpose flour
1/2 tsp ground sage (I will use fresh, finely minced)
salt
1/2 cup vegetable broth (made with collected veggie trimmings)
4 T extra virgin olive oil

Preheat the oven to 35o degrees. Lightly oil a 9x13" baking dish or 5 qt gratin dish.

In a large bowl, combine the squash, parsley and garlic. Sprinkle with the flour, sage and salt; toss well to combine. Add the broth and 2T of the oil; stir well to combine. Transfer to the prepared baking dish and drizzle with the remaining oil.

Bake for about 1 hour, stirring halfway through the cooking time, or until the top is nicely browned and the squash is meltingly tender.


I am very excited to live in a town that has a whole, vibrant organization in place to create a sustainable Willits.
I will report back next Sunday with pictures and a story.

Thursday, October 12, 2006

The Low Cost of Local and Low Waste

I continue to be amazed at how much simpler everything gets the more local and low-waste we go. Beo had a great post on his blog a while back about how much we've been able to reduce our waste. As he mentioned in that and another post, besides the environmental impact of reducing our waste, our cost of food has gone down as well. Eating whole foods in-season is not just environmentally responsible, it's healthier, supports local farmers and saves money. For example, organic squash was 99 cents a pound ($1/pound off) at Good Harvest today, because it's so plentiful here right now. The butternuts we bought were grown about 30 miles from our home. At the height of summer, organic zucchini was going for a song there. There's no extra cost from importing it across the country, so the bounty is passed on to us not just as food but in savings.

Reducing our packaging has helped immensely. When we made the switch from packaged cereals to steel-cut oats, it was initially because we wanted to save on packaging. A box of organic cereal is $3-$4 minimum, and we're paying 89 cents a pound for steel cut oats. We eat a lot of breakfast foods in this house, and I estimate we were spending at least $10 a week on cereal before. Now it's about $2. There again, the steel cut oats are healthier for us, and we save the cardboard box and the plastic liner. Today we asked for larger containers of raisins, wheat germ, and other items that the store normally has packaged in small deli containers. Not only did we save the packaging, but the store manager offered us a discount because we were saving them on the cost of that packaging. We're still saving about $50 a month on our groceries since we went low-packaging. (By the way, this won't save you money, but: we were simply reusing bulk bags, but they do wear out, so we recently decided to go ahead and purchase these very affordable organic cotton bags. They are lightweight and fabulously sturdy. Check out Reusablebags.com to order them, as well as many other waste-saving products.) Many thanks to NCFarmGirl of the WW Veggie Board for starting the bagging contest that inspired us to reduce our waste! I think this is the second week in a row we've "missed" garbage collection day, and it really didn't matter.

Then there are the savings from our garden. We've had a fresh salad for dinner every night this week, at a cost of at most a few cents per serving. We didn't buy tomato sauce all summer. Instead of frozen organic veggies we had fresh green beans and peas for months. All this for a family of 4 on a small suburban garden! We had a cold front move through this week. It was 48 yesterday and only 35 today, but it looks like our cold frame/hot house is going to work great and allow us to continue saving in this manner.

There are definitely some things that cost more in their organic or sustainable forms, but eating the whole foods way at least balances out and if you really try, actually saves you money. Amazing.
Here's what's on the table locally this week: Grocery: Milk, cheese, yogurt, onions, potatoes, cauliflower, squash. Garden: Lettuce, Peppers, Carrots.

Wednesday, October 11, 2006

I Have Compost Issues

When I saw the photo of Beo's compost, I had this huge stab of er, um, compost envy. And the reason why is that due to some unknown piece of Goddess' plan, Tara and I just suck at making compost. We are very, very good at making worms happy, but our attempts at taking food scraps from the stainless bowl that sits by the sink in the house to a small can outside the back door, to a pile in the garden has, for almost 3 years just been a totally gross, smell, slimy mush pile of rotting food refuse.

Maybe it's because the ground we started with is clay and rock and very unkind and there was nothing like topsoil to make the kitchen detrius become, nice friable compost. We'd thrown grass clippings onto the pile and turned them in to no good effect. We have put weeds and trimmings in as well, again to no good effect. We even took bagged compost that we bought and mixed it in, hoping for that to do the trick. That didn't work either. But as I said, it made the worms very happy. And the worms eat lots of rotten food and multiply so all our beds are writhing with lovely earthworms.

But that does nothing to solve the issue of sustainability when you are making mulch beds that are layers of straw, horse manure and compost and you are buying your compost in 3 cubic foot bags for almost $6.00 apiece.

So recently a neighbor had a garage sale and we bought this big beauty made by Enviro Cycle Systems. She said she paid over $200 for it and just wasn't using it. We got it for $40. Tara took the black trash can up into the woods and filled it with oak and madrone leaves and forest duff for brown material, as it is the dry season here and no one mows grass in the dry months. You mow your grass here in June when it is still somewhat green and that's it until next spring. No more mowing. The deer graze what's left and no one waters their wild grasses because we all pay for our water and why would you water or run a gasoline engine over a fire hazard? Hence, there are no grass clippings from the summer through fall.

Back to the Enviro Cycle composter. My neighbor said you need to spin it around a couple of times a day. I did that. We would dump the kitchen container and follow that with a bowl full of leaves and duff. Spin the composter and spin it again later for good measure. There are holes on the opposite side of the hatch that allows the liquifying food scraps to drain into the base of the composter, making a lovely smelling compost tea.

We attempted our first load. I don't know what I expected, but I didn't expect this extremely heavy mass of muck which was what we got with the first go through. Yesterday, it was so heavy and hard to turn, that I just knocked it off its base and rolled it down the slight grade to the huge pile of horse manure that we have just rotting quietly behind the back fence of the garden. I dug down in the older pile and lo! Beautiful soil! A summer in the sun had broken down the pile that had been dumped in the late spring. Under the clods on top is beautiful planting mix. And I know it is perfect for planting because it's this year's version of what I grew my entire lower garden in this year: Decomposed horse manure, Arabian horse manure at that, and straw and the aforementioned 3 cu' bags of soil building compost. But I digress.....I dumped the composter's aromatic contents into the hole I had dug and covered it with this lovely manure. And thought I would try again.

But I am hoping that Beo has some sage compost advice for me, because the raccoons have already gotten into the pile I buried in the manure and I'm already plagued by raccoons and don't need to be encouraging them with tasty rotting food scraps. And the reason I bolded and italicized the words huge pile of horse manure is quite simply that I am green with envy and know that he will envy my manure pile.

And here is some of the beauty that grows out of almost pure Arabian horse manure. Mother Nature is my bomb!

Tuesday, October 10, 2006

Experimental Hot House Garden

The last post on the DIY coldframe was sticking to tried and true territory. But along the way to finding an even cheaper option my brain came up with this:

What you see here is my attempt to make a hothouse in Suburbia sans fresh cow manure. The idea of a hot house is simple. Take a cold frame, but dig down 18" or so. Then fork in a foot of fresh cow/horse manure mixed with straw and then top it with 6" of good topsoil. The manure will compost over the next months and heat the soil under your plants keeping them toasty while the weather outside is frightful, plus provide your crop with wicked good nutrients. Love the idea! Don't have any manure. I do have 2 full bins of compost freshly turned and ready to fire. My bins hit 140 degrees... heck why not? So I basically put a reinforced version of the No Tech coldframe on top of my compost bin and we'll see what happens. One addition not in these shots is that I strapped a bungee cord over the top to keep it from blowing off.

Steps for the No Tech Frame will come this weekend, but here is how I built the Hybrid Tech System, which wil lset you back about $13 if you get the covers on sale:

Supplies:
2 Plastic Window Well Covers ($5-10 each)
1 1x2x8' Firring strip
7 #6 machine screws/nuts/washers ($1-2)

Tools:
Saw (hand or power) to cut firring strips
Tape measure
Screwdriver and pliers for machine screws
Clamp to hold sides together during assemble
Drill with 1/8" bit
First up is building a frame to brace the well covers and give it support enough to hold together with the compost bin pushing them apart. The Plastic Covers I had came with a nice indent that when two covers were fitted together formed a 1x2 gap-hence the firring strip. Cut the strips to match the dimensions of the gap in the covers you find. Once the strips are cut, clamp the two covers together with the cuts strips inside as so:
Once the firring strips are in place drill holes thru the covers and strips and insert the machine screws, with a washer on each side, as so. I put 2 on each side and 3 across the top. I did not use any glue or join the wood at all, trusting in the plastic to provide a degree of rigidity.

That's it! I ensured prior to this that my compost bin was the right size. To find my plans on my uber cheap and portable compost bin check out my other blog. Before capping the bin I threw on an inch or so of finished compost, raked it level and sprinkled in carrot, spinach and radish seeds. My hope is that the incredibly loose compost will make for amazing root crops. And I have utterly failed to grow spinach this year for reasons unknown. With the seeds going on pure compost if spinach won't grow there I will either get my soil professionaly tested or stop trying spinach.

This 'garden' will be way out on the experimental limb. We'll keep you posted. Another thought was that if you can find the plastic window well inserts that match these covers and are about 18-24" high you could build a coldframe without wood and with very little carpentry. Ironically Menard's had lots of window wells, but none to fit the covers-go figure!

Stay tuned for the No Tech Cold Frame!

Let's Start Simple

Over the past year, my recipes have grown increasingly complex, but as I've stated in my musings, simple is always good too. Let's start with a basic meal from what's around Wisconsin this week. After a very busy day for both Beo and I, I needed something easy and quick for dinner. So we did a very simple salad and bread. The lettuce, tomatoes and carrots were all harvested from our garden. The lettuce and carrots are still around this week. Tomatoes have been gone for some time, but Beo harvested what green 'maters were left when he took the vines down and turned the gardens under. They've just started ripening up this week. I topped the salad with Morningstar Farms Chik'n Strips I found in the back of the freezer. We've actually stopped purchasing these, but they're a great topper for stir frys and salads. We've switched to tempeh now-a more organic, less processed option. We had our salad with sourdough bread that Beo made over the weekend. For the kids, the meal was easily modified to a side salad, grilled cheese on sourdough with organic cheese from the Farmer's Market, and ketchup to dip their chik'n strips in. Incidentally, they're just as happy to eat the healthier tempeh that we now normally have instead. An omnivore friendly household could obviously just top this meal with a locally pastured organic option. Dessert was fresh pears from a local orchard. The pears weren't organic, but grown with IPM techniques. We've been learning more about this method this year. Organic fruit is tough here in Wisconsin, and IPM is a good option. I do have a mission to visit the one certified organic orchard in the state though, and will post about it in the future if all goes well. This was a was a very filling meal, and pleasantly fresh for October!

Monday, October 09, 2006

DIY Low Tech Cold Frame

In our attempt to produce food deep into a Zone 4 Fall and possibly into a (gasp!) early winter, we need help. First up is our Low Tech Cold Frame. These instructions will build you one 16 sq ft cold frame with a hinged lid with very few frills-it looks hard but isn't. If you have ever used a power saw you can do this. If you haven't go to your Home Depot and take one of their free classes on using power tools. Knowing how to make stuff for yourself is a critical step for sustainability. Carpentry is really very simple-like building Legos with only a slightly higher risk of major injury. I took the plans I had seen on line, and minimized the amount of lumber-most use 2" dimensional lumber which would make the box about 3x as expensive and it would weigh over a hundred pounds. Through thoughtful design the 1/2" plywood sides will support the box amply while using 25% of the wood-saving money, wieght and most importantly: trees.

Supplies:
1 4'x8' sheet of 1/2" plywood ($10)
1 2x2x8' Pine ($2)
3 1x2x8' Pine Firring Strips ($3)
3 2" 'T' strap hinges ($4)
1 Package of Storm window plastic sheeting ($2)
1 bx 3/8" staples ($3)
A handful of small (1") nails and deck screws (1 3/4") and some wood glue.
Optional: 1 Quart Boiled Linseed Oil ($6) to give the pine a chance against Ma Nature.
Extra Credit: Run two cedar 2x4 ($10) under the box to seperate the pine from the soil and a thermometer to hang inside of it ($2)
Tools:
Circular Saw-preferrably with a blades suited for both plywood and crosscutting
Straightedge (I used a board) and carpenter's pencil
A good hammer
Cordless Screwdriver/Drill (Use a regular screwdriver if you're built like a truck)
Tape Measure
1 or 2 Clamps to hold wood for cuttting/assemply
Eye and ear protection for the power tools
Staple Gun
Carpet Knife

Assuming you have the tools on hand, this should get you a cold frame for under $40-you will make that back in one season of fresh greens. The big savings are in using the clear plastic intended for stormwindow insulation instead of plexiglass ($40) or a roll of 4 mil sheeting ($25).

Great let's get started! First mark out the plywood (or if you are using the linseed oil roll it onto both sides of the plywood first). Measure up one side of the plywood and make marks at 28", 56", 72", 88" and 96". On the other side (start at the same end as the first side!) make marks at 28", 44", 72", 88", and 96". Now take the straight edge and draw lines straight across connecting the 28", 72", 88", and 96" marks. Then connect the diagonal line between the 44" and 56" marks. The diagonal pieces will be your cold frame's sides. Now firmly clamp the plywood, don your eye and ear protection and make cuts along all 5 lines. Cuts will be easier if you adjust your circular saw to only cut about 1" deep. You should be left with 1 4'x 28" piece (back) 1 4'x16" piece (front) and 2 trapezoids for the sides. The left over piece will be used to make the braces for the top-mark out 8" tick marks along it's length and cut out 6 triangles with 8" sides and bases roughly 11.25" ( the diagram below actually makes 4 triangles by cutting the middle one in half again)

Now take your 2x2 and cut 2 27" pieces, and 2 16" pieces. These you place into the corners of the box to give you something to nail/screw it together with. Make sure the 27" pieces are aligned flush with the bottom fo the cold frame to account for the angled sides. Before you nail the pieces on put some wood glue on the 2x2 where it will touch the plywood just for kicks. I nailed the 2x2 corners on to the front and back peices and then clamped the sides to them while I used a cordless screw gun and 1 3/4" deck screws to put the sides on. Screws help cinch the wood together, while trying to nail the sides on would just pummel your coldframe to bits. Now you cold frame should look like a great big box with no bottom (a good thing!) or top (something we'lll need to rectify!).

The top will be the hardest part. If you have a line on some old storm windows or plexiglass now is your chance to put it to good use. In either case modify the dimensions of the box (remember to measure the slant of the trapezoid sides, not with the windows lying flat!) to fit them and skip this step. I had neither so I fabbed up this el cheapo lid. Take your 1x2 firring strips and cut 2 pieces to 48", 2 to 49", and 1 to 46". If your firring strips are not this long you can either splurge for another firring strip, shorter the sides of the box, or pack some insulation in the resulting gap. These will be the frame for the plastic 'window' of your frame. Lay them out so that the 48" pieces will be the front and back, and the 49" pieces will be the sides, leaving the 46" one for the middle. I cut mine with fancy 45 degree cuts on the corners for no good reason other than to justify my snazzy new power miter saw and to clarify that I am, indeed, more than a little anal. Lay them out as so.
There is no need to try to nail the itty bitty 1x2 corners together-you will just end up swearing and embarrassing yourself infront of the neighbors. Once it is laid out, take the 8" triangle pieces of plywood and nail them into each corner and onto the middle brace ('pointy' end in!)-again wood glue is recommended at this step. It is important to inset them 5/8" from the outside edge of the lid to leave room for the lid to sit flush with the box. This gives the lid some serious strength on the cheap while keeping it light. Hopefully your lid looks something like this now:Now take out the uber cheap plastic and lay it across the lid. I lined the seams up across the middle brace and then stapled it onto the non braced side (outside) of the lid-try to keep the plastic as taut as possible by pulling as you go. Since I had 2 pieces of plastic left I repeated this on the inside of the lid trying to mimic a double paned window's insulation.

Almost done! Now take the lid and lat it across the cold frame box and screw in your 'T' hinges across the top of the lid the strap side onto the back of the box. It will most likely be easier to predrill the holes with a teeny-tiny (1/8") drill first. Once the holes are drilled I removed the hinges from the box for transport to the garden! That's right: your done!

Now find a nice sunny sight protected from winter winds and orientate the coldframe so the angled lid faces due south. We placed ours in the middle of our 'fall' bed so the others can have their winte rye/vetch crop come in undisturbed. Before you place it in the garden, prepare the soil as you would for any planting-add your amendments, and rake it smooth. One item of note-due to the 16" front of our box you will need to space the front rows back, or paint the inside of the box white to prevent the front rows from being shaded out.

We opted to keep the price down by not using any cedar-this means that the coldframe will rot after the first season or two. Luckily it is tall enough that I can saw 3" of rotten wood off the bottom every year and still get 3-4 seasons out of it. Cheap ways to prolong the wood life would be to coat the plywood with linseed oil like I did, or better yet, lay the coldframe on a foundation of loose bricks, flagstones, or 2x4 cedar.

Happy planting!


Sunday, October 08, 2006

Caution, Gardener with Tools!

So dinner tonight started with a mixed greens salad with 2 varieties of carrots. No big deal except that all 3 varieties of greens and both of carrots (dragon and Nantes) came from our garden not an hour before and it is the second week of October in WI. 2 years ago I was in the belief that gardening was a summer hobby-one that distinctly ended in early September here in Zone 4. But then reading books like Eliot Coleman's Four Season Harvest, and the knowledge I picked up working on a CSA opened my eyes to the idea of seasonal plantings that can extend the season up to frost-or beyond with Leeks and Kale. So this year when the basil came down in August, in went carrots, lettuce, and radishes (which the basil had replaced in June!)

The fact that garden fresh tomatoes are precious beyond compare is common knowledge. But what happened to carrots on the way to the supermarket is downright criminal. Carrots are sweet, not starchy. Carrots are tender, not with skin so tough it has to be peeled to be edible. And carrots don't have to be orange-cultivars in red, white, yellow, and even purple exist and are delicious. Kids don't like veggies? Start a garden! I don't like store bought carrots either. Now I have to pick at least 2-3 carrots extra for dinner because I know that each of our kids will eat one on the way. Prep work? A good scrubbing with a brush under cold water: no peeling, no steaming, and no butter or ranch. The sugars in carrots start turning to starch the second you pull them. Eat them within the hour and they are like candy.

But looking at the shortening days and crisp nights I know that even the lettuce will soon fade. When Mia and I were discussing this blog, and the thought of staying local thru the WI winter we went from "can't do it-not without a root cellar" to the opposite spectrum "look this greenhouse here is only $1300!". I kept coming back to the plans I've seen for cold frames. The fact that they are all very different, but engineered the same led me to believe that as long as you stick to the theory (get heat in and keep it there long enough to warm the soil), the materials had a lot of lee way. Cold frames on line go for about $100-$250. In my hubris, I think I can build anything with a basic structural plan, 2 hours of free time, some scratch paper, $50, and a good hardware store. And today that is what I did.

So in the hopes of prolonging the bliss into December I broke out the power tools today and built a cold frame. Actually I will be building 2. One is dirt cheap, but you need some carpentry tools, knowledge of their use, and $40 in supplies. We'll call this one Low Tech. The other requires zero skill, a screwdriver, and $10. Let's call that one No Tech.

Look for upcoming step by step posts for both!
When Maddy approached me about writing this blog, the first thing I thought is: "No. It would be way too hard to do what she's asking." I figured she had it way easier in Northern California. We have a much longer and colder winter here in Wisconsin. Then I realized that I didn't know what was possible until I tried, and I decided to give it a shot.

This year Beo and I have really made an effort to have our food as local as possible. Beo produced a great amount of food from our own gardens, we tried to be more frequent visitors at local farmer's market, and we found a locally owned grocery store that's equally far away from as Whole Foods, but has more local organic produce options. I really haven't explored what the possibilities are for eating local and organic in winter in Wisconsin. Last year we ate organic, but much of it came from far away.

So as we start this endeavor, I find myself feeling quite like a squirrel. Each day is a little colder, and suddenly it feels like there isn't nearly as much food as we need. We've preserved only a few items, just enough for a few winter meals. When I look around with my squirrel brain though, I see the abundance that's possible. We still have kale, lettuce, peppers, and basil in our own garden. The farmer's markets are full of squash, corn, apples and more.

My goal with this blog is to try to discover some simple and economic methods that will work to help us eat local year round.

Saturday, October 07, 2006

Introduction and How I Got HERE

I met Mia on the Weight Watcher's Vegetarian Message Board. From there I discovered her Eco Mama Blog and Beo's The Future is Insight Blog which I read regularly. I've watched hers and Beo's journeys to permaculture their suburban WI lot, grow some of their own food, shop locally to feed their family and do some Prairie restoration. I have my own almost year old blog called Body Tales of the Heart and Scales which is mainly about my weight loss journey and my road to all-over health. I'd been writing a lot about my garden and the harvest and really getting away from the laser bream focus of my Weight Watcher's journey. Maybe that is because the garden has been such a big and important part of my life these past months and that I've made my weight loss goal and just don't have as much to talk about regarding that part of my life. But as we move towards what feels inevitably to be the end of oil, becoming self-sustaining in all ways possible is a huge onion to peel and since I seem to relish peeling onions, here I am.

So I approached Mia about co-creating a blog. I think we three all have very similar values towards the stewardship of the little pieces of Earth that are in our care. We all are on a similar path to eat local, to become more self-sustaining and grow and eat organic food. I was thrilled that she said yes to this and that Beo wanted to participate too. I think they are both pretty brilliant! And I think we've all been affected by the 100 mile challenge idea. It's not hard to eat within 100 miles of your home in the late summer and early fall. As Tara and I have preserved a lot of our summer into fall fare, we will be enjoying tomatoes, pears, tomato sauce, dehydrated beans, corn and summer squash and stored winter squash far into the new year.


My partner Tara and I have owned our little piece of N. CA paradise for 3 years exactly today. We came in here to this kooky develpment in Mendicino County, CA that is carved out of a mountainside and is built over the partially healed devastation of a clear cut Redwood forest. The clearcutting happened after the 1906 earthquake to help rebuild San Francisco. The forest has had 100 years to recover and where there is forest, it has changed to 2nd and 3rd growth Redwood and Douglas Fir and the more opportunistic Madrone, Manzanita and Tan Oaks. These trees are thickly clustered throughout the greenbelt, able to grow pretty abundantly with the acid pH change from the demise of the old growth Rredwoods and all the shade and moisture they produce. Some of the land here is field rather than forest and hosts large Black Oaks and Valley Oaks which thrive in open space. Our little piece is surrounded to the north and west by forest, but we are on the gently curving sides of a bowl that bottoms out into a manmade lake which is the develpment's water source. We have a young redwood grove on our berm, but the rest of our land is clay, rock soil field, probably created with a bulldozer back in the 1960s.

Tara had received the book Gaia's Garden for her birthday the year we moved here. I know Beo uses this book too. If you are at all interested in the idea of permanent agriculture, it is a must read. We used the model of "Bomb Proof Sheet Mulch" to create our garden. And now as we go into our 4th winter, our garden probably covers 1/8th of an acre of our 1/2 acre. All our beds are sheet mulched. It was the only way to sustainably grow here where the summer days go over 100 degrees for weeks at a time and the growing season is long and water is expensive and soon to be scarce.


When I say it's a long season, I'm still harvesting foot long beans, tomatoes, summer and winter squash and carrots and have recently planted lettuce, with onions, garlic, spinach and broccoli on deck. The chard happily reseeds itself all over the garden and grows through any cold weather we get in the winter. What I mean by cold is that it freezes through much of December which is usually a pretty dry month, then it rains in earnest through April with a few small snow falls thrown in. We have frost regularly too.


Last year we built a small cold frame, under which I kept a cayenne pepper plant going until that hard, cold weather of December hit and successfully grew chard, spinach and carrots throughout the winter. We are wanting something a little bigger this year and hopefully Tara can build it before it gets too far along into the season. Otherwise, I'll just do intensive planting under the one we have, which needs a new plastic covering and I will hopefully have good stories to report about what's happening under there.


So off we go! I do hope you enjoy reading about our journeys!
Maddy