DIY Low Tech Cold Frame
In our attempt to produce food deep into a Zone 4 Fall and possibly into a (gasp!) early winter, we need help. First up is our Low Tech Cold Frame. These instructions will build you one 16 sq ft cold frame with a hinged lid with very few frills-it looks hard but isn't. If you have ever used a power saw you can do this. If you haven't go to your Home Depot and take one of their free classes on using power tools. Knowing how to make stuff for yourself is a critical step for sustainability. Carpentry is really very simple-like building Legos with only a slightly higher risk of major injury. I took the plans I had seen on line, and minimized the amount of lumber-most use 2" dimensional lumber which would make the box about 3x as expensive and it would weigh over a hundred pounds. Through thoughtful design the 1/2" plywood sides will support the box amply while using 25% of the wood-saving money, wieght and most importantly: trees.
Supplies:
1 4'x8' sheet of 1/2" plywood ($10)
1 2x2x8' Pine ($2)
3 1x2x8' Pine Firring Strips ($3)
3 2" 'T' strap hinges ($4)
1 Package of Storm window plastic sheeting ($2)
1 bx 3/8" staples ($3)
A handful of small (1") nails and deck screws (1 3/4") and some wood glue.
Optional: 1 Quart Boiled Linseed Oil ($6) to give the pine a chance against Ma Nature.
Extra Credit: Run two cedar 2x4 ($10) under the box to seperate the pine from the soil and a thermometer to hang inside of it ($2)
Tools:
Circular Saw-preferrably with a blades suited for both plywood and crosscutting
Straightedge (I used a board) and carpenter's pencil
A good hammer
Cordless Screwdriver/Drill (Use a regular screwdriver if you're built like a truck)
Tape Measure
1 or 2 Clamps to hold wood for cuttting/assemply
Eye and ear protection for the power tools
Staple Gun
Carpet Knife
Assuming you have the tools on hand, this should get you a cold frame for under $40-you will make that back in one season of fresh greens. The big savings are in using the clear plastic intended for stormwindow insulation instead of plexiglass ($40) or a roll of 4 mil sheeting ($25).
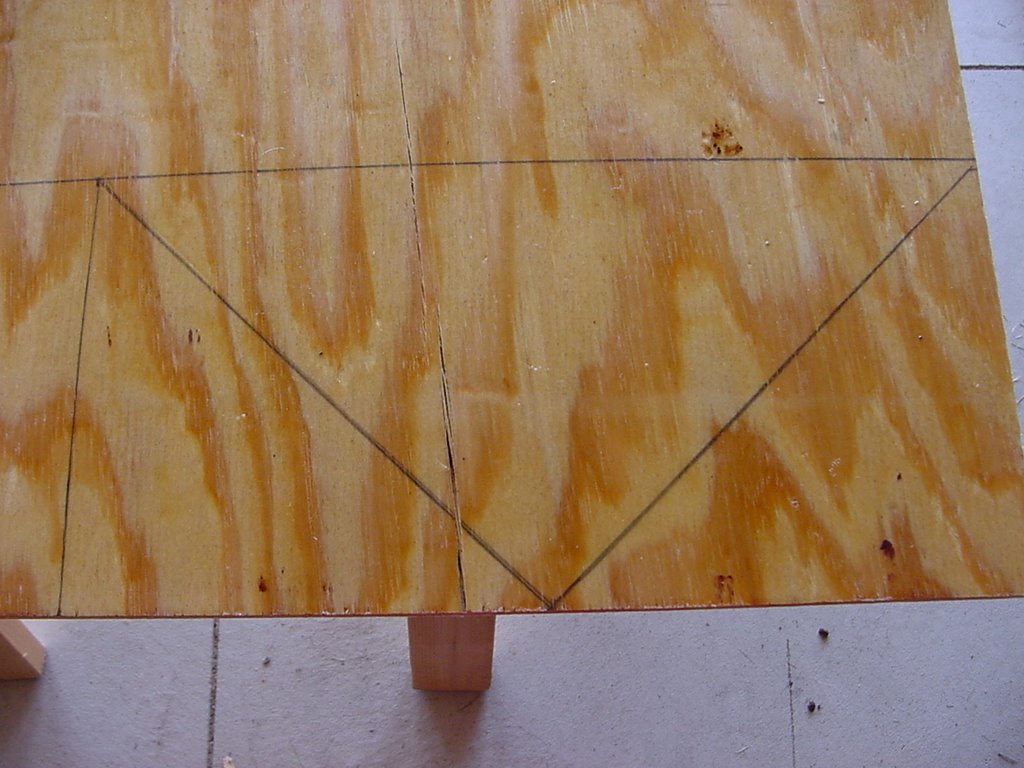
Great let's get started! First mark out the plywood (or if you are using the linseed oil roll it onto both sides of the plywood first). Measure up one side of the plywood and make marks at 28", 56", 72", 88" and 96". On the other side (start at the same end as the first side!) make marks at 28", 44", 72", 88", and 96". Now take the straight edge and draw lines straight across connecting the 28", 72", 88", and 96" marks. Then connect the diagonal line between the 44" and 56" marks. The diagonal pieces will be your cold frame's sides. Now firmly clamp the plywood, don your eye and ear protection and make cuts along all 5 lines. Cuts will be easier if you adjust your circular saw to only cut about 1" deep. You should be left with 1 4'x 28" piece (back) 1 4'x16" piece (front) and 2 trapezoids for the sides. The left over piece will be used to make the braces for the top-mark out 8" tick marks along it's length and cut out 6 triangles with 8" sides and bases roughly 11.25" ( the diagram below actually makes 4 triangles by cutting the middle one in half again)
 Now take your 2x2 and cut 2 27" pieces, and 2 16" pieces. These you place into the corners of the box to give you something to nail/screw it together with. Make sure the 27" pieces are aligned flush with the bottom fo the cold frame to account for the angled sides. Before you nail the pieces on put some wood glue on the 2x2 where it will touch the plywood just for kicks.
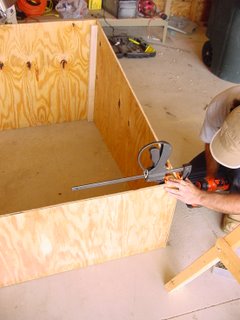 I nailed the 2x2 corners on to the front and back peices and then clamped the sides to them while I used a cordless screw gun and 1 3/4" deck screws to put the sides on. Screws help cinch the wood together, while trying to nail the sides on would just pummel your coldframe to bits. Now you cold frame should look like a great big box with no bottom (a good thing!) or top (something we'lll need to rectify!).
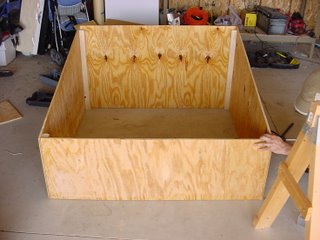
The top will be the hardest part. If you have a line on some old storm windows or plexiglass now is your chance to put it to good use. In either case modify the dimensions of the box (remember to measure the slant of the trapezoid sides, not with the windows lying flat!) to fit them and skip this step. I had neither so I fabbed up this el cheapo lid. Take your 1x2 firring strips and cut 2 pieces to 48", 2 to 49", and 1 to 46". If your firring strips are not this long you can either splurge for another firring strip, shorter the sides of the box, or pack some insulation in the resulting gap. These will be the frame for the plastic 'window' of your frame. Lay them out so that the 48" pieces will be the front and back, and the 49" pieces will be the sides, leaving the 46" one for the middle. I cut mine with fancy 45 degree cuts on the corners for no good reason other than to justify my snazzy new power miter saw and to clarify that I am, indeed, more than a little anal. Lay them out as so.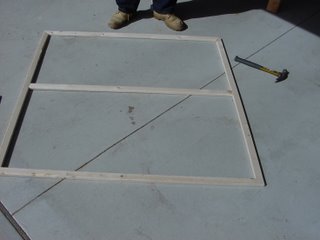
There is no need to try to nail the itty bitty 1x2 corners together-you will just end up swearing and embarrassing yourself infront of the neighbors. Once it is laid out, take the 8" triangle pieces of plywood and nail them into each corner and onto the middle brace ('pointy' end in!)-again wood glue is recommended at this step. It is important to inset them 5/8" from the outside edge of the lid to leave room for the lid to sit flush with the box. This gives the lid some serious strength on the cheap while keeping it light. Hopefully your lid looks something like this now: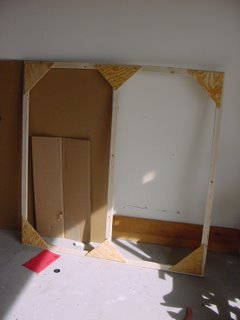 Now take out the uber cheap plastic and lay it across the lid. I lined the seams up across the middle brace and then stapled it onto the non braced side (outside) of the lid-try to keep the plastic as taut as possible by pulling as you go. Since I had 2 pieces of plastic left I repeated this on the inside of the lid trying to mimic a double paned window's insulation.

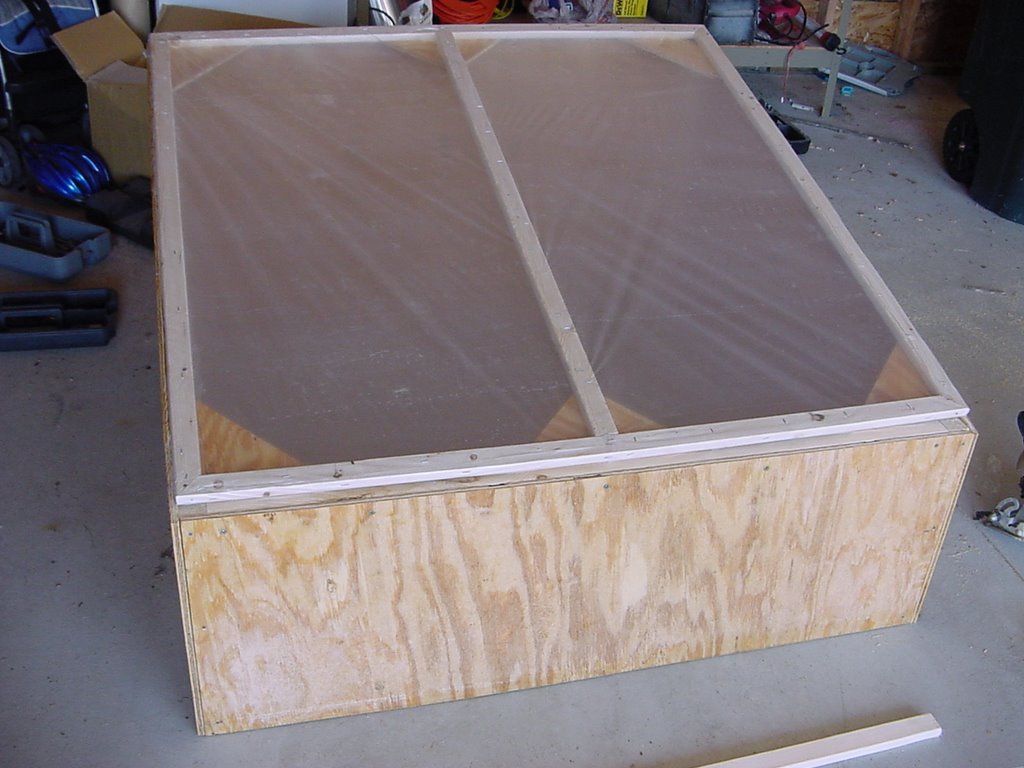
Almost done! Now take the lid and lat it across the cold frame box and screw in your 'T' hinges across the top of the lid the strap side onto the back of the box. It will most likely be easier to predrill the holes with a teeny-tiny (1/8") drill first. Once the holes are drilled I removed the hinges from the box for transport to the garden! That's right: your done!
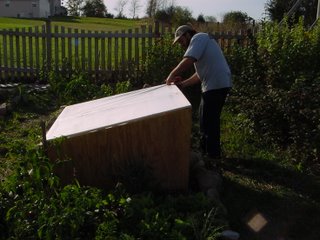
Now find a nice sunny sight protected from winter winds and orientate the coldframe so the angled lid faces due south. We placed ours in the middle of our 'fall' bed so the others can have their winte rye/vetch crop come in undisturbed. Before you place it in the garden, prepare the soil as you would for any planting-add your amendments, and rake it smooth. One item of note-due to the 16" front of our box you will need to space the front rows back, or paint the inside of the box white to prevent the front rows from being shaded out.
We opted to keep the price down by not using any cedar-this means that the coldframe will rot after the first season or two. Luckily it is tall enough that I can saw 3" of rotten wood off the bottom every year and still get 3-4 seasons out of it. Cheap ways to prolong the wood life would be to coat the plywood with linseed oil like I did, or better yet, lay the coldframe on a foundation of loose bricks, flagstones, or 2x4 cedar.
Happy planting!
Supplies:
1 4'x8' sheet of 1/2" plywood ($10)
1 2x2x8' Pine ($2)
3 1x2x8' Pine Firring Strips ($3)
3 2" 'T' strap hinges ($4)
1 Package of Storm window plastic sheeting ($2)
1 bx 3/8" staples ($3)
A handful of small (1") nails and deck screws (1 3/4") and some wood glue.
Optional: 1 Quart Boiled Linseed Oil ($6) to give the pine a chance against Ma Nature.
Extra Credit: Run two cedar 2x4 ($10) under the box to seperate the pine from the soil and a thermometer to hang inside of it ($2)
Tools:
Circular Saw-preferrably with a blades suited for both plywood and crosscutting
Straightedge (I used a board) and carpenter's pencil
A good hammer
Cordless Screwdriver/Drill (Use a regular screwdriver if you're built like a truck)
Tape Measure
1 or 2 Clamps to hold wood for cuttting/assemply
Eye and ear protection for the power tools
Staple Gun
Carpet Knife
Assuming you have the tools on hand, this should get you a cold frame for under $40-you will make that back in one season of fresh greens. The big savings are in using the clear plastic intended for stormwindow insulation instead of plexiglass ($40) or a roll of 4 mil sheeting ($25).
Great let's get started! First mark out the plywood (or if you are using the linseed oil roll it onto both sides of the plywood first). Measure up one side of the plywood and make marks at 28", 56", 72", 88" and 96". On the other side (start at the same end as the first side!) make marks at 28", 44", 72", 88", and 96". Now take the straight edge and draw lines straight across connecting the 28", 72", 88", and 96" marks. Then connect the diagonal line between the 44" and 56" marks. The diagonal pieces will be your cold frame's sides. Now firmly clamp the plywood, don your eye and ear protection and make cuts along all 5 lines. Cuts will be easier if you adjust your circular saw to only cut about 1" deep. You should be left with 1 4'x 28" piece (back) 1 4'x16" piece (front) and 2 trapezoids for the sides. The left over piece will be used to make the braces for the top-mark out 8" tick marks along it's length and cut out 6 triangles with 8" sides and bases roughly 11.25" ( the diagram below actually makes 4 triangles by cutting the middle one in half again)
 Now take your 2x2 and cut 2 27" pieces, and 2 16" pieces. These you place into the corners of the box to give you something to nail/screw it together with. Make sure the 27" pieces are aligned flush with the bottom fo the cold frame to account for the angled sides. Before you nail the pieces on put some wood glue on the 2x2 where it will touch the plywood just for kicks.
 I nailed the 2x2 corners on to the front and back peices and then clamped the sides to them while I used a cordless screw gun and 1 3/4" deck screws to put the sides on. Screws help cinch the wood together, while trying to nail the sides on would just pummel your coldframe to bits. Now you cold frame should look like a great big box with no bottom (a good thing!) or top (something we'lll need to rectify!).
The top will be the hardest part. If you have a line on some old storm windows or plexiglass now is your chance to put it to good use. In either case modify the dimensions of the box (remember to measure the slant of the trapezoid sides, not with the windows lying flat!) to fit them and skip this step. I had neither so I fabbed up this el cheapo lid. Take your 1x2 firring strips and cut 2 pieces to 48", 2 to 49", and 1 to 46". If your firring strips are not this long you can either splurge for another firring strip, shorter the sides of the box, or pack some insulation in the resulting gap. These will be the frame for the plastic 'window' of your frame. Lay them out so that the 48" pieces will be the front and back, and the 49" pieces will be the sides, leaving the 46" one for the middle. I cut mine with fancy 45 degree cuts on the corners for no good reason other than to justify my snazzy new power miter saw and to clarify that I am, indeed, more than a little anal. Lay them out as so.

There is no need to try to nail the itty bitty 1x2 corners together-you will just end up swearing and embarrassing yourself infront of the neighbors. Once it is laid out, take the 8" triangle pieces of plywood and nail them into each corner and onto the middle brace ('pointy' end in!)-again wood glue is recommended at this step. It is important to inset them 5/8" from the outside edge of the lid to leave room for the lid to sit flush with the box. This gives the lid some serious strength on the cheap while keeping it light. Hopefully your lid looks something like this now:
 Now take out the uber cheap plastic and lay it across the lid. I lined the seams up across the middle brace and then stapled it onto the non braced side (outside) of the lid-try to keep the plastic as taut as possible by pulling as you go. Since I had 2 pieces of plastic left I repeated this on the inside of the lid trying to mimic a double paned window's insulation.
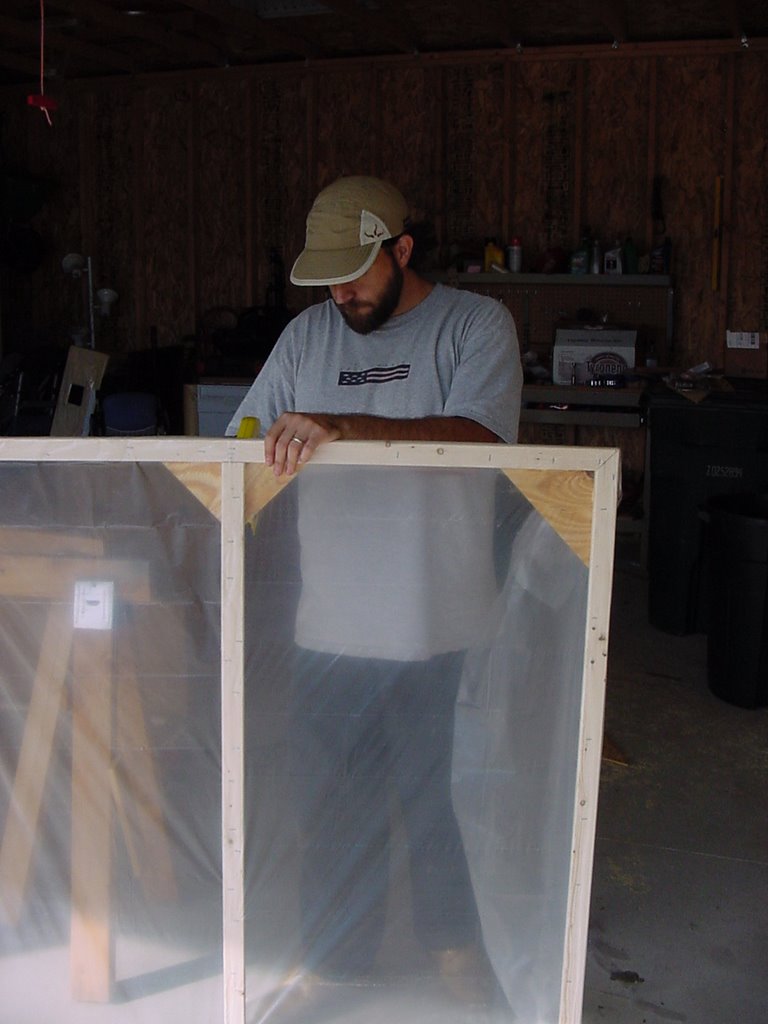
Almost done! Now take the lid and lat it across the cold frame box and screw in your 'T' hinges across the top of the lid the strap side onto the back of the box. It will most likely be easier to predrill the holes with a teeny-tiny (1/8") drill first. Once the holes are drilled I removed the hinges from the box for transport to the garden! That's right: your done!

Now find a nice sunny sight protected from winter winds and orientate the coldframe so the angled lid faces due south. We placed ours in the middle of our 'fall' bed so the others can have their winte rye/vetch crop come in undisturbed. Before you place it in the garden, prepare the soil as you would for any planting-add your amendments, and rake it smooth. One item of note-due to the 16" front of our box you will need to space the front rows back, or paint the inside of the box white to prevent the front rows from being shaded out.
We opted to keep the price down by not using any cedar-this means that the coldframe will rot after the first season or two. Luckily it is tall enough that I can saw 3" of rotten wood off the bottom every year and still get 3-4 seasons out of it. Cheap ways to prolong the wood life would be to coat the plywood with linseed oil like I did, or better yet, lay the coldframe on a foundation of loose bricks, flagstones, or 2x4 cedar.
Happy planting!
posted by Beo at 7:26 PM
![]()
![]()


2 Comments:
Thank you for this.
building mine tomorrow. wasn't sure what to do with some leftover plywood from last weekends project. thanks!!
Post a Comment
<< Home